The Purr…fect Fence – Revisited

February 18th, 2011  |  Published in Life

In early 2010 we bought a single Purr…fect fence unit. If you don’t remember, I wrote about my experience installing it. Well, we decided it would be a good idea to expand the fence by ordering another single unit. It was a lot more work than I anticipated, I ran into a few problems that required some ingenuity but in the end it was well worth it. The cats are much happier with the added space and we feel much more comfortable. Here are the details of the upgrade.

Learn from my mistakes!

Here are some “before” pictures…

This turned out to be about a 40′ x 28′ area for the cats, we wanted to make it larger so they could see around the house and be able to run more. We ordered a single unit while they were having a sale that included a free gate.

Step 1.

I needed to take down the old fence and preserve it to my best ability (I was planning on using it again). This was going really well at first, until I go to the post sleeves. It was an especially dry time of the year when I was trying to pull these out of the ground. I was able to get a few of them out, but it became almost impossible for me to remove them (without digging them out. I tried everything and some of the posts sleeves just wouldn’t come out.

This left me in a bit of a predicament. I had already taken down the fence and didn’t have enough post sleeves to put it back up. So, I took one of the post sleeves to Lowe’s to see what I could find. As it turns out the post sleeves are pretty much the same material as aluminum conduit pipe. I bought some aluminum blades for my jigsaw and two 12′ conduit pipes (I believe they were 2 1/4″ width).

I got home, measured the actual post sleeves and started cutting the pipe to length. I needed to make the point at the end of the sleeve (to help drive it into the ground). So I took my 8 lbs. Maul and hit the end of the new sleeves until they were as pointed as possible. They weren’t pretty, but they’d do the job. I ended up burning out the motor on my crappy little Black & Decker jig saw. I ended up cutting about 6 new sleeves to replace the ones buried in the ground.

Left: My attempt to make a point with the Maul; Right: The standard pole sleeve from Purrfect Fence

Both sleeves are about the same size, you'll notice the one from Purrfect fence is a little messed up on the end (you'll find out why later)

The only thing I couldn't replicate was these little dimples, it's not necessary, but it is used to keep the poles at a standard height (I just had to manually screw them to the correct height).

Step 2.

Time to put up the new fence! Again, easier said than done. Remember that dry time of year I told you about? Well, the dry Georgia clay just got harder and dryer about 1 foot into the ground. I destroyed some of the post sleeves trying to smash them into the ground.

It was A LOT harder getting those things into the ground than it was with my first installation. NEVER EVER install one of these things during the dry season in Georgia! As much as I love this fence, it will make you cry. Luckily I had a few extra post sleeves (that I made myself) and was eventually able to get all the sleeves into the ground.

Here are some pictures of the homemade post sleeves and some of the damage done to the sleeves from trying to hit them into the ground.

Force + Resistance = Busted

The drive cap for each sleeve actually started to go INSIDE the sleeve...

Step 3.

Next I had to install the poles. This was pretty straight forward. The only extra bit I had to worry about was with my new homemade post sleeves. The Purrfect Fence sleeves have little dimples that hold the poles above the bottom of the sleeve (about 8 inches). In order to make the poles even in height, I had to make sure I drilled the poles into the sleeves at the right height. This was easiest with two people, I had my wife hold the pole and I used a tape measure to put it in the proper height. Then I drilled the pole into the sleeve (which is part of the installation process anyway). This way all the poles in the home made sleeves were the same height as the regular sleeves.

Step 4.

Once I got all the sleeves and poles in, the rest was pretty much exactly like the original installation process. The only difference was that I had a large slope on one side of the house (which is explained in the DVDs that come with the fence). I also had to make sure I had enough fence to cover the area (since my old fence was cut in some spots). I tried to lean towards having a little too much and ended up with the perfect amount left over. I had a spot in between two posts that I had to zip tie together. It is not a big deal and it is hardly noticeable. I basically worked around from one side of the house until I got to the end of the fencing, then the other side of the house. Once the fencing was installed on the poles, nice and taught, I zip tied the two separate fences together. I tried to make them as tight as possible without causing any extra bowing.

I also have a hill in the backyard to content with, so I needed to angle the outside corners of the fence. This wasn’t a huge problem, it’s just like a normal 90 degree corner (just a little easier).

Step 5.

After you’ve installed the fencing material and put down the chew guard, you have to do the dreaded stakes. By the way, the chew guard that came with this fence was a little different than the chew guard I had with the old fence. This was a little more malleable and seemed like a smaller gauge.  I did ended up pinching a nerve in my hand trying to push down the chew guard with my fist. Just happened to pinch right between my pinky and ring finger nuckles and BAM a throbbing pain in my hand. It hurt for a couple weeks, kind of a numb feeling. I almost went to the doctor, but eventually it worked itself out.

So, the staking… oh how I hate the staking. Staking is even worse when you are already dealing with dry ground and have spent too many hours bashing in 3′ sleeves. Now I had to deal with these stakes! It was even more miserable than it was last time. I wish there was a stake gun! I spaced the stakes out a little more than I did last time. Everything seems to have held up so far. It took me as long as I expected, but it was still too long to be happy about it.

Step 6.

Now that everything is staked in and my arms are gel, it’s time to zip tie the guard to the fencing. This was not so bad, last time I zip tied about ever 2″, this time I did it every 3″-4″ (which is what they recommend). I also discovered a better method for zip tying. Previously, I would pull the fencing and try to force the fence bottom to be “straight”. I realized that this was actually causing extra bowing in the fence because of how the fencing naturally forms to the fence poles and level of the ground. So, instead of trying to force the fence “line” to be straight, I just zip tied every 3″-4″ where the fence naturally met with the chew guard. The fence has a lot less bowing in it now and looks much nicer.

And then the fence is done! Well, almost…

Step 7.

One of the reasons we bought the additional fence was because it came with a free gate! I didn’t install it until a few weekends after installing the fence, but it was very simple to add. Their instructions are pretty straight forward. Just zip tie the whole thing onto the fence and then cut between the lines.

Here are some “after” pics… I actually just took these last weekend, so the grass and back hill might look a bit different :).

It has been several months since I actually upgraded the fence and I have to say the cats LOVE the extra room… we all do. The fence is a lot less noticeable, we have more room to do stuff with them and we were even able to add a swing to the back yard (as you can see). The cats also get to see around the house, although, if there is anything good to look at, they usually freak out and run back inside. They’ve even brought in a couple mice for mommy!

So my advice, install the fence when you know the ground is soft, otherwise you are going to be in some serious pain. But even if you have to do it in the middle of a drought, it’s worth it.

Tags: , ,

Purr…fect Fence

March 12th, 2010  |  Published in Life

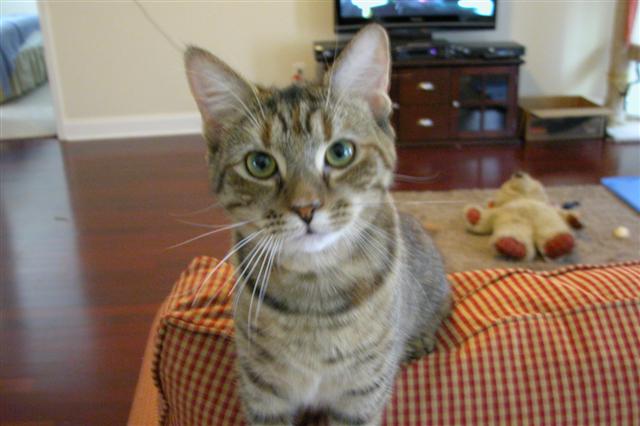
As you all know, we have seven wonderful cats who are all indoor/outdoor cats. Unfortunately, cats are known to be curious. We’ve had issues with some of our cats disturbing our neighbors. Well Kati and I decided that if we want to keep the peace in our neighborhood, then we are going to have to find a way to contain our cats to our yard. However, this is not an easy task. After searching online for different ways to keep our cats in our yard we found the Purr…fect Fence.

There were two options, the free standing kit or the conversion kit. The conversion kit is much cheaper, but it requires an actual fence. We considering getting a privacy fence and buying the conversion kit, but this would have been a much pricier and much harder task. So we opted to purchase one free standing kit. You cab order online but I had a few questions first. So I called them directly. It seems like a pretty small operation; the guy I spoke with was extremely nice. He was very helpful with my questions. I would have felt comfortable calling him back for anything else.

I did not document putting the fence up the way I wanted to. But it is actually pretty easy. There are several components to the free standing kit. The first thing I did was measure, measure, and measure again. You are suppose to put the poles at a maximum of 14 feet apart. Butted up against the house, we were able to get a 40′ x 28′ area for the cats to call their own.

Tools I used:

  • Measuring Tape
  • Hammer
  • 8lbs. Maul (I think this actually worked out better than a normal sledge hammer would have)
  • Drill (actually go to buy a new one for this project)
  • Tin Snips
  • Muscles
  • Brain
  • Step Ladder (for drilling the u-brackets)
  • Flags (for marking where I wanted to drive the pole inserts)

I would recommend (but did not use):

  • Stanley Hog Ringer

Putting Up The Fence (pictures at the bottom of this post)

I used some thin rope and a few stakes to measure out my straight lines and angles. Then I followed the line and measured out the points where I needed to place the poles. The poles actually go into an insert that you drive into the ground. The pole inserts are 2′ long and you drive them in to about 1′ 11″. This was actually pretty hard work. I used a maul to drive my inserts into the ground. Once the inserts are in, you slide the poles into the inserts and screw the insert and pole to secure them together. The only trouble I had was with the poles against the house. The inserts that I drove in went in at a slight angle. So the pole was right up against the house, which made it very tight going into the insert. I actually had to use the axe part of the maul to wedge between the house and the insert to get some slack for putting the poles in. I put in all the corner poles first to make sure I had the correct angles and lines, then I put in the other poles. I used all eight poles that come with the kit (do not forget to put the pole caps on).

The next step was to attach the pivoting arches to the poles. I was not as precise with this step, basically you just slide the arches on top of the pole and tighten them. I put the arches on so you could just see the pole cap. I made it as straight as possible by eye and tightened them with a wrench. Be careful not to tighten them too much and strip them.

The next step is to attach the polypropylene fencing to the arches. I strayed a tad from their instructions on this. Starting with one of the poles closest to the house, I attached the top part of the fencing to the end of the arch with a small zip tie. Then I went on to the next pole to do the same. I did this until I reached a corner pole and went back to start zip tying the rest of the fence. Basically you just move down the arch from its tip. I did a large zip tie immediately before and after the pivot and one at the base of the arch. Then I did one more at the very bottom of the fencing. I did not worry about the middle part of the fencing until later. However, this ended up being a bit of a problem for me.

On the corner poles, they actually recommend cutting the fencing and starting fresh. I did not really want to do this. I wanted to preserve the fence as much as possible, in case I decide to extend it, or if we move and decide to take it with us. Instead I folded the fence over itself and zip tied the arch to the fence. It was a little tricky, and I actually ended up snipping part of the fence to make it look better. Then I moved onto finishing the fence.

Once I got to the last pole, I needed to go back to each pole and start putting more zip ties around the pole and the fencing. I basically did one large zip tie for ever arm length (wrist to elbo). Except on the poles closest to the house, I did one large zip tie every two fence squares. I think this is what they recommend, because you do not want your cats squeezing out through any loose holes. As I was putting the extra zip ties on I discovered my error at the arches. Apparently in my attempt to make the fence as taught as possible, the middle (unzip tied) section of the corners was a little bowed out. Which meant that if I wanted to zip tie them, it was going to be extremely tight. I was able to do what I needed but it would have been much easier if I had zip tied the whole pole as I was going.

After I finished zip tying the polypropylene fencing to all the poles and arches I noticed that the arches against the house were pulled away a little bit. They actually include some u-brackets to screw to the house for this issue. I probably should have installed them first, but I was hoping I would not need to screw holes in the house. It turns out I did, which was not a huge deal, it just required that Kati come out and help push the poles up against the house while I maneuvered around fencing with an electric drill, u-bracket, and screw.

The next step in installing the Purr…fect Fence is to install the chew guard. There is actually about a 10 inch gap between the bottom of the polypropylene fencing and the ground. Do not worry, they do this on purpose. They supply you with a chew guard, which is welded wire, instead of polypropylene fencing. This helps prevents other animals from chewing through the bottom of the fence and getting in… or letting your cats get out. It was actually pretty easy to work with. You are suppose to bend it into an L shape, with at least two squares at the bottom. I choose to do four squares, two might have been better. You are also suppose to attach the top of the chew guard to the polypropylene fencing. They recommended doing this every four inches (four squares), but I did it every two inches. Two inches just made me more comfortable. However at about 94 linear feet, I ended up pulling around 560 zip ties — not including the zip ties I pulled for the rest of the fence. Needless to say, this was extremely tedious. They actually recommend using a hog ringer to do this, it is much quicker and easier. However, I could not find any place around Athens that sold hog ringers (or even knew what one was). And it turns out they sell for 100$ online, which was way too much money for a single project — not to mention I was not about to wait for a tool to ship in order to put up a fence. I can also buy a hog ringer later and replace the zip ties with hog rings.

The last step in putting up the Purr…fect Fence is staking the chew guard to the ground. They provide you with plenty of high quality stakes for this job. You are suppose to put one stake every 2 feet and alternate between the front and back of the chew guard. I would rather pull 1000 more zip ties than drive these stakes into the ground. For the most part our yard is just Georgia clay but every once and while I would hit a rock that would not budge. It was quite a pain the butt and I was very glad to be finished.

Once you have the fence all setup, you just need to go around and clip the ends off your zip ties and clean up any mess. I ended up with about 7′ of fencing left over. Which is about right, I think I ended up using 94′ one side was 28′, another was 26′ (because the house extends 2′) and the back was 40′. I have about 6′ or 7′ left over. I really wanted to have enough to fence in my garage, but I needed 17′.

I actually went back a week later to clean up my fence, to go around and cut all the excess off from the zip ties and to clean up the corners. The corners I just cut from the bottom of the arch to the top, straight through the middle. Then I laid one part of the fence over the other and zip tied it all together. It actually turned out really well and the cats seem to be enjoying their new restricted freedom.

We have had one great escape though, but it is no fault of the Purr…fect Fence. I moved my grill and did not think that the cats would be able to jump from the grill to the roof. But sure enough, Monday morning I heard a bang. I did not think much of it until I let some of the cats in and noticed one was not there. I went outside to look to see if she was hiding somewhere and she was touring the roof.

I have since moved the grill back to its original location. I am considering using the leftover fence to build a barrier to the roof so I do not have to worry about it… it is just an idea floating in my head though.

Here are some pictures of the fence (some are before I cleaned up the zip ties) and my animals. If you have any questions, I would be glad to answer them.

Tags: , ,